5 video recording tips from a pro
 Now that you’re home practicing social distancing and following the stay-at-home order, most of you have already perfected your WebEx, Zoom and Skype calls. From time-to-time, you may also be asked to shoot additional videos of yourself to send to a professor, students, a colleague or the University. You might be thinking, “What’s the best way to shoot video on my mobile phone?”
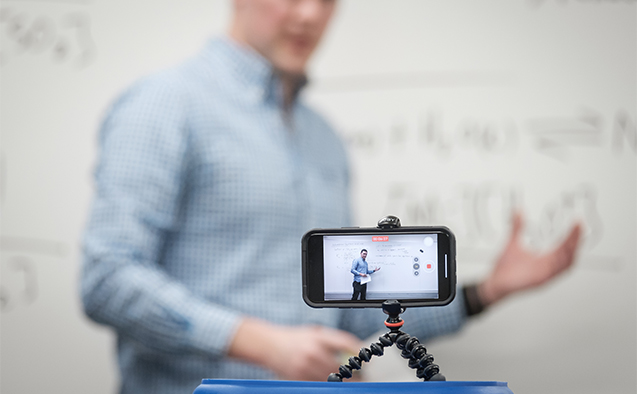
I’m Mike Shaw, a videographer in the Office of Communications and External Relations (CER) here at Wake Forest. That’s a question I’m often asked, so I’ve compiled a list of five tips (and some tools) to help you produce your best self-shot videos right in your own living room.
But before we jump into those tips and tools, let’s check your camera settings.
Check Your Phone’s Camera Settings
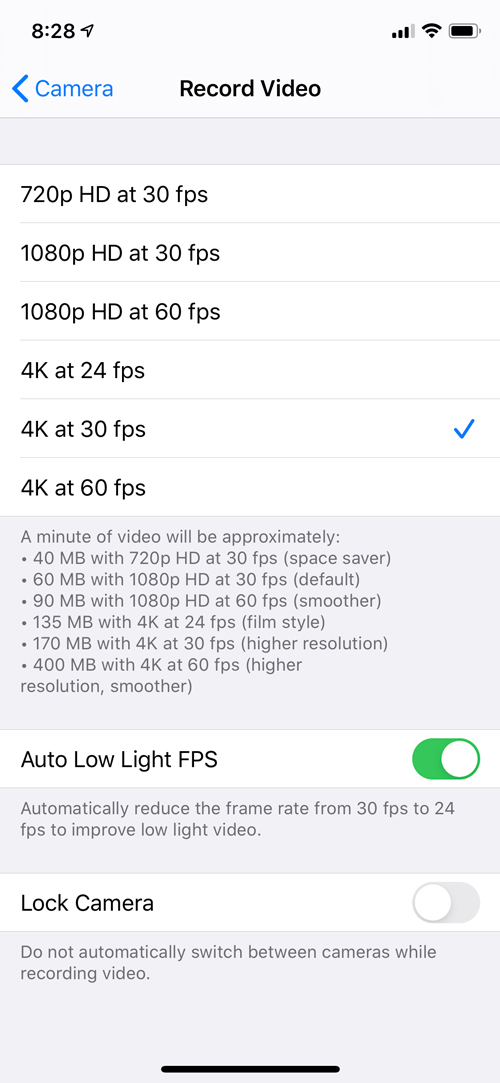 Most mobile phones on the market have the ability to shoot high definition (HD) video. It’s important to adjust your settings to make sure you’re getting the most out of the camera.
Depending on the type of phone you have, you may see a wide range of video settings. Ideally, you’ll want to shoot at the highest resolution available (usually 4K or 1080p HD). However, if your phone’s highest resolution is 720p HD, that will work. 4K is the preferred setting here.
You may also notice different frame rates (fps) for each of these settings. The ideal frame rate is 30 fps. If you have this option, choose that. If not, 24 fps works well, too.
Learn how to change your settings for an iPhone or Android.
Important: When possible, use the camera on the backside of your phone. The front-facing camera (the one you shoot selfies with) isn’t ideal, but if you must use it make sure you’re looking directly at the lens and not the screen.
Tips & Tools for Shooting Your Best Mobile Phone Video
1. Keep Your Phone Steady
One of the best things you can do while shooting video on your phone is to keep the phone steady. No one likes shaky video unless you’re into those Cloverfield movies.
What’s the best way to keep your phone steady? Use a phone mount connected to a tripod. They’re relatively inexpensive and worth the purchase.
- Desktop/tabletop: Manfrotto Pixi Mini Tripod Kit – $28.19
- Full-size: UBeesize 51” Tripod Stand with Phone Mount – $22.99
Don’t want anything delivered to the house? It’s time to get creative. There are all kinds of DIY methods for keeping your phone steady, but here are three solid ideas from CNET.
2. Make sure you can be heard
Audio is often overlooked when it comes to making a great video. There are several options for enhancing audio quality, but they all come at a cost. Phones are generally good at capturing quality audio. But, I would purchase a microphone if you can.
There are all kinds of microphones for mobile phones on the market. Here are a few I have used and recommend:
- Pro-quality, but expensive: Rode smartLav+ Lavalier Microphone – $78
- Great for the price: PoP voice Professional Lavalier Microphone – $16.99
Note: You’ll need to use the 3.5mm to Lightning adapter if you have an iPhone.
3. Find the light
Lighting your at-home shoot can even be a challenge for professional videographers who find themselves home without their typical lighting gear. Yes, that’s me speaking from recent experience. Don’t worry, you’re not alone.
We all have access to a free light source that will do the trick, even on the cloudiest of days. Here are a few tips for getting the most out of natural light in your home.
Windows can be your best friend or your worst enemy, depending on location. It’s knowing where to sit in relation to the window that can make all the difference.
- DO face a window with your phone between you and the window
- DO sit beside the window if the light is too bright, or it’s in your eyes
- DO NOT sit in front of a window, unless you want to look like this
- DO NOT open the window, it’s a noisy world out there
Lamps are great for lighting videos when it’s dark outside. You probably have the perfect lamp for video lighting, but it will take a little prep work and positioning.
- DO use a lamp that outputs white light – stay away from yellowish bulbs
- DO remove the lampshade to see if that lighting is better (back on if not)
- DO make sure the light height is just above eye level
- DO NOT put the lamp behind you (the same reason with windows above)
- DO NOT stare into the light (a moment of levity)
The phrase professional lighting might sound expensive and daunting, but it’s not. There are thousands of light choices available for purchase. In this case, you really only need one, simple light for your video. I’d recommend purchasing the same light I use at home.
4. Pay attention to your background
For me, this is so important – and easy to forget.
Finding the right background in your home will vary from person-to-person. Take a moment to look around. Find something already? For me, I go to a room in my home that has unoccupied wall space for a solid, single-color background.
Others love to sit in front of grand bookcases. If you take a moment to look around, you’ll probably quickly find something that’s right for you. Just make sure that your background isn’t a distraction and to remove anything you don’t want to be seen in the video.
5. It’s all about the details
This one is simple. These are the things to do before every shoot.
- Make sure your phone’s battery is fully charged
- Clean your phone lens (yes, your pockets are full of lint, you know)
- Make sure you have plenty of video storage available on your phone
- Ideally, use your phone’s rear camera for the best quality video possible
- If you must use the front-facing camera, make sure you look at the lens, not at yourself on the screen
- Make sure you’re recording in a quiet space (it’s a good time to let Fido out)
Sharing Your Video
There are so many different ways to share your video, but we prefer Google Drive because there are no restrictions on size limits. Sending your video to us is simple:
- Upload to Google Drive using Google’s app (iTunes | Google Play)
- Once uploaded, share the file with us by clicking the share button
- Share your file with CER by sharing it to this email address – social@wfu.edu
- Don’t forget to add a message to let us know what your video is about
- Note: Give yourself plenty of time to account for uploading via home WiFi
Categories: #WakeFromHome, Social@WFU, Video